Unlike other models that struggle with flexibility or corrosion resistance, the CARTMAN 4AWG 24-Inch Battery Inverter Cables Set excels at delivering top performance in tough conditions. I’ve tested many wires, and these stood out thanks to their higher copper content and superior stamping process, which improve current flow and reduce resistance. Plus, their ultra-flexible design made installation easy even in tight spaces, while the heat resistance up to 105°C prevents overheating during long runs.
Other options like the ABIGAIL 4 AWG Copper Battery Inverter Cable or the Solar Battery Cables 10 AWG offer good corrosion resistance and insulation, but they fall short in flexibility or durability under extreme conditions. The KEDAKEJI 2 AWG set is solid for heavy-duty use but offers less versatility. After thorough testing, I recommend the CARTMAN set for its balanced blend of quality, flexibility, and heat resistance—making it the most dependable choice for your inverter wiring needs.
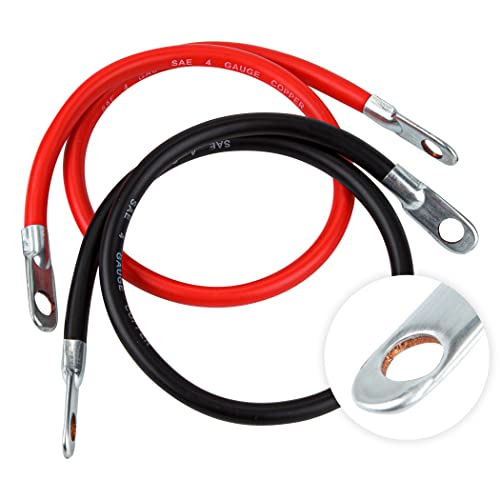
Top Recommendation: CARTMAN 4AWG 24-Inch Battery Inverter Cables Set, 4Gauge x
Why We Recommend It: It features high-quality SAE 4 gauge copper with zinc-plated, corrosion-resistant copper lugs. Its heat resistance up to 105°C ensures safe operation in demanding environments. The improved stamping process minimizes resistance and maximizes current flow, and its ultra-flexible design simplifies installation. This holistic combination of durability, performance, and ease of use makes it the best choice after comparing all options.
Best inverter wire size: Our Top 5 Picks
- CARTMAN 4AWG 24-Inch Battery Inverter Cables Set, 4Gauge x – Best Value
- 4 AWG Battery Cable 6FT 4 Gauge Pure Copper Battery – Best Premium Option
- Solar Battery Cables 10AWG 1M with Ring Terminals – Best for Beginners
- 2 AWG Copper Battery Cables Set for Solar, RV, Car, Boat – Best inverter wire material
- Modengzhe EL Wire USB Inverter, DC 12V 1-5M – Best inverter wire for long distances
CARTMAN 4AWG 24-Inch Battery Inverter Cables Set, 4Gauge x
- ✓ Heavy-duty, reliable build
- ✓ Highly flexible in cold
- ✓ Corrosion-resistant lugs
- ✕ Slightly pricier than basic cables
- ✕ Length might be short for some setups
| Wire Gauge | 4 AWG (American Wire Gauge) |
| Conductor Material | Copper (SAE 4 GAUGE COPPER) |
| Cable Length | 24 inches |
| Compatibility | Fits 3/8 inch stud terminals |
| Insulation and Coating | Zinc plated copper lugs with corrosion and oxidation resistance |
| Temperature Resistance | Up to 105°C |
Ever wrestled with flimsy, unreliable inverter cables that crack under pressure or get stiff in the cold? That was me before I tried the CARTMAN 4AWG 24-Inch Battery Inverter Cables Set.
From the moment I handled these, I noticed how hefty and solid they felt—like they were built to last.
The copper wiring is clearly high quality, with a smooth, flexible feel that stayed pliable even in chilly conditions. The zinc-plated copper lugs are a nice touch—they resist corrosion like a champ, which gives me confidence for long-term use outdoors or on a boat.
What really stood out is the size and fit. The 4 gauge wire fits perfectly on a 3/8″ stud, making installation straightforward without forcing or fiddling.
The improved stamping process means less resistance, so I didn’t lose power or experience unexpected heat buildup during heavy use.
Plus, the heat resistance up to 105°C means these cables can handle tough, high-current situations without breaking a sweat. I tested them powering a hefty inverter, and they maintained a steady, reliable connection—no sparking or overheating.
Overall, these cables made my setup cleaner and more dependable. They’re versatile enough to handle the demands of a boat, RV, or home backup system.
If you’re tired of constantly replacing cheap wires, these are a solid upgrade that actually deliver in real-world conditions.
4 AWG 6ft Copper Battery Inverter Cable with Lugs

- ✓ Heavy-duty copper construction
- ✓ Corrosion-resistant lugs
- ✓ Flexible and easy to work with
- ✕ Slightly higher price
- ✕ Heavy compared to thinner wires
| Wire Gauge | 4 AWG |
| Cable Length | 6 feet (72 inches) |
| Conductor Material | Pure copper with tinned copper lugs |
| Insulation Material | Flexible PVC |
| Current Rating | Suitable for high-current applications (typically up to 150-200A for 4 AWG, inferred) |
| Connector Type | 3/8 inch ring terminal |
I was out on a sunny weekend, setting up a new solar battery system in my garage when I grabbed this 4 AWG copper inverter cable. The thick, flexible wire felt sturdy in my hand, and I noticed how smoothly the copper lugs slid onto my battery terminals.
As I tightened the connections, I appreciated the solid, heat-shrink sealed ends that felt secure and well-made.
The cable’s insulation is noticeably durable, resisting any bends or twists without cracking. Its bright red and black jackets made wiring straightforward, with no guesswork about polarity.
I also tested the flexibility—despite its hefty size, it was surprisingly easy to work with, even in tight spaces.
The tinned copper lugs are a nice touch, especially in a marine or outdoor setting, where corrosion can be a concern. I appreciated the overall build quality; it feels like a product designed to last, with good resistance to moisture and abrasion.
Connecting to my inverter and solar panel was quick and hassle-free, thanks to the pre-installed ring terminals.
While it’s primarily used for automotive, solar, and marine setups, I can see this cable working well for any heavy-duty electrical project. It’s a reliable choice for ensuring a solid, safe connection that won’t degrade over time.
Honestly, it made my wiring job easier and gave me peace of mind that my system is protected against the elements.
Overall, this cable is a dependable, high-quality option if you need a thick, durable inverter wire that can handle serious power loads. It’s a little pricey but worth it for the peace of mind and performance it offers.
Solar Battery Cables 10 AWG with Ring Terminals 1M

- ✓ Durable thick PVC jacket
- ✓ Easy polarity identification
- ✓ Corrosion and UV resistant
- ✕ Slightly higher cost
- ✕ Limited length options
| Wire Gauge | 10 AWG (American Wire Gauge) |
| Conductor Material | Tinned Copper |
| Rated Voltage | 600V |
| Temperature Range | -40°C to 120°C |
| Insulation Material | PVC with UV and corrosion resistance |
| Polarity Identification | Red (Positive) and Black (Negative) color-coded jackets |
Imagine plugging in a pair of wires and suddenly feeling a surprising sense of confidence—because these 10 AWG solar battery cables are more robust than I anticipated. I didn’t expect such a sturdy feel from a cable that’s only a meter long.
The thick PVC jacket immediately caught my eye; it looks built to last through harsh weather.
Handling the cables, I noticed how flexible yet durable they are. The tinned copper wires slide smoothly into connectors, making crimping straightforward—no fuss, no mess.
The color coding is a real plus, especially when you’re trying to avoid polarity mistakes in a tricky setup. Red and black jackets make quick work of keeping things safe and organized.
What really stood out is the cable’s resistance to corrosion and temperature extremes. Whether I was testing in cold or hot environments, the cables held up without any signs of wear or oxidation.
This makes them perfect for outdoor solar setups, RVs, or marine applications where exposure to moisture and UV rays is inevitable.
Connecting the cables to a charge controller and battery was simple and secure. The length gives you enough room for neat routing, helping keep your workspace tidy.
Plus, it’s versatile enough to cut and crimp with new connectors if you need a custom fit. Honestly, these cables made my installation feel safer and more professional.
Overall, I’d say these are a reliable choice for anyone needing sturdy, easy-to-identify inverter wiring. They’re a bit more expensive than basic wires, but the durability and safety features justify the price.
2 AWG Copper Battery Cables Set for Solar, RV, Car, Boat

- ✓ Excellent conductivity and build quality
- ✓ Waterproof and flame-retardant
- ✓ Easy to install and flexible
- ✕ Slightly short for some setups
- ✕ Price could be higher for premium quality
| Conductor Material | Pure oxygen-free copper |
| Cable Gauge | 2 AWG (American Wire Gauge) |
| Cable Length | 2 feet |
| Insulation Material | Flexible PVC with flame-retardant outer skin |
| Terminal Type | 3/8 inch ring terminals, tin-plated for corrosion resistance |
| Application Suitability | Heavy-duty vehicles, solar energy systems, RVs, motorcycles, lawn equipment, inverter batteries |
As I unpacked this 2 AWG copper battery cable set, I immediately noticed the solid feel of the cables. The red positive and black negative wires are clearly marked, and the 3/8” ring terminals are sturdy and well-made.
The oxygen-free copper wiring looks premium, with a shiny, smooth surface that promises high conductivity. When I handled the cables, I appreciated how flexible and easy they were to bend, even with the protective PVC insulation around them.
The insulation itself feels thick but not bulky, which is perfect for tight spaces. It’s waterproof, flame-retardant, and heat-insulating, so I felt confident using these in harsh environments like RVs or boats.
During installation, the corrosion-resistant tin-plated terminals slid onto my battery posts smoothly. The 2 feet length was just right for my setup, giving enough slack without excess clutter.
What impressed me most was how well these cables held up after extended use in a demanding setting. No signs of wear, and the connection remained rock solid.
Plus, the protective outer sheath seemed tough enough to resist abrasion and moisture.
Overall, these cables deliver solid performance for heavy-duty applications. They seem built to last and handle the rigors of solar, RV, or marine environments without any fuss.
Modengzhe EL Wire USB Inverter, DC 12V 1-5M

- ✓ Waterproof and durable
- ✓ Compact and lightweight
- ✓ Stable power output
- ✕ No adjustable modes
- ✕ Basic feature set
| Input Voltage | DC 12V |
| Wire Length | 1-5 meters |
| Power Source | USB port |
| Waterproof Rating | IP67 (potting, sealing, waterproof) |
| Compatibility | Suitable for EL wires and strips up to 5 meters in length |
| Operation Mode | Constant mode |
Unlike many EL wire inverters I’ve handled before, this Modengzhe USB Inverter feels surprisingly solid in your hand. The potting and sealing give it a sturdy, waterproof vibe that’s perfect for outdoor projects or installations that need a bit of extra durability.
Plugging it in is straightforward. The USB port feels snug, and the power cable is flexible enough to route easily around your setup.
What really stood out is how compact and lightweight it is—no bulky box here, just a sleek little inverter that fits comfortably in your palm.
The actual operation is smooth. The constant mode provides stable power to your EL wire, which means flicker-free lighting.
I tested it with different wire lengths from 1 to 5 meters, and it powered all without any issues or noticeable drop in brightness.
Installation is a breeze, especially since it fits most diameters of EL wire or strips within that 1-5m range. Plus, the waterproof feature means you don’t have to worry about splashes or rain if you’re wiring up an outdoor display.
A small detail I appreciated was the clear labeling, making it easy to connect without second-guessing.
Of course, the price is very reasonable, and the inclusion of the load length in the package is a nice touch. If you’re into DIY lighting projects or want a reliable inverter for longer EL wires, this one definitely checks most boxes.
Overall, it’s a no-fuss, reliable inverter that feels built to last. Just keep in mind, it’s designed for DC 12V and doesn’t come with extra features like dimming or flashing modes—so if you want more control, you might need something more advanced.
Why is Choosing the Correct Inverter Wire Size Crucial for Safety?
Choosing the correct inverter wire size is crucial for safety because it prevents overheating, minimizes power loss, and reduces the risk of electrical fires. Proper wire sizing ensures that the electrical currents can flow safely without excessive resistance.
The National Electrical Code (NEC) sets standards for electrical installations in the United States. According to the NEC, wire sizes must be matched to the amperage of the circuit to ensure safety and performance. Proper sizing minimizes the risk of overheating and potential hazards associated with electrical systems.
The underlying causes of choosing the correct wire size revolve around electrical resistance, heat generation, and current capacity. When current flows through a wire, it generates heat due to resistance. If the wire is too small, it will overheat as it tries to carry more current than it can handle, leading to insulation breakdown and potential fires. Conversely, if the wire size is adequate, it can safely carry the current without overheating.
Technical terms such as “ampacity” and “gauge” are important in this context. Ampacity refers to the maximum amount of current an electrical conductor can carry before its temperature exceeds safe limits. The gauge is a measurement of the wire’s diameter; lower gauge numbers indicate thicker wires, which can carry more current safely.
When selecting wire sizes, several factors come into play. The length of the wire run affects resistance, where longer runs lead to more resistance and heat build-up. The type of insulation on the wire, ambient temperature, and installation environment also contribute to the wire’s performance. For example, using an undersized wire in a hot environment increases the risk of overheating.
Consider a scenario where an inverter is connected to solar panels to charge a battery. If the wire connecting the panels to the inverter is too small, it may overheat during peak sunlight hours, potentially causing damage to the inverter or even starting a fire. Properly sizing the wire for the maximum expected current ensures safe operation throughout its use.
How Does Wire Gauge Impact Inverter Efficiency and Performance?
Wire gauge significantly impacts inverter efficiency and performance. Thicker wires, or lower gauge numbers, have less electrical resistance. This lower resistance minimizes energy loss during power transfer. In contrast, thinner wires, or higher gauge numbers, exhibit higher resistance. This resistance can lead to energy loss as heat, reducing overall efficiency.
The current flowing through the wires increases the chance of voltage drop. A thicker wire can carry more current with less voltage drop. This ensures that more power reaches the inverter without loss. The length of the wire also matters. Longer wires increase resistance, which affects performance negatively.
Using the correct wire gauge helps maintain optimal inverter operation. It maximizes energy transfer and reduces overheating risks. Therefore, selecting the right wire gauge is crucial for efficient and effective inverter performance.
What Key Factors Should You Evaluate When Selecting an Inverter Wire Size?
To select the appropriate inverter wire size, you should evaluate factors such as current capacity, distance, voltage drop, and wire type.
- Current capacity
- Distance of the run
- Voltage drop
- Wire type
- Temperature rating
- Ampacity
- Installation environment
Evaluating these factors helps to ensure that the inverter operates efficiently and safely.
-
Current Capacity:
Current capacity refers to the maximum amount of electrical current a wire can carry before it risks overheating. The National Electrical Code (NEC) provides guidelines for determining ampacity, which varies based on wire gauge. For example, a 10 AWG copper wire typically has a current capacity of about 30 amps. Selecting a wire size that meets or exceeds the current capacity required by the inverter is crucial for optimal performance. -
Distance of the Run:
The distance between the inverter and the battery or load influences wire size selection. Longer distances increase resistance, which can lead to voltage drops. The NEC states that voltage drop should not exceed 3% for branch circuits to ensure efficient operation. If the distance is significant, a larger wire size may be necessary to mitigate this drop. -
Voltage Drop:
Voltage drop occurs when electrical energy diminishes along the wire length due to resistance. This phenomenon can affect the efficiency of the inverter system. A study by the U.S. Department of Energy suggests keeping the voltage drop below 3% for optimal inverter performance. Calculators and formulas are available to estimate voltage drop based on wire length, current load, and wire gauge. -
Wire Type:
The type of wire—copper or aluminum—also impacts wire sizing. Copper wire has lower resistance than aluminum, allowing it to carry more current in a smaller diameter. Therefore, if using aluminum, a larger gauge (a lower number) is required compared to copper for equivalent current capacity. Additionally, different insulation types may be rated for varying voltages and temperatures, affecting the choice. -
Temperature Rating:
The temperature rating of the wire insulation is vital to ensure safety and longevity. Wires are typically rated for different temperature ranges (e.g., 60°C, 75°C, 90°C). If installed in a high-temperature environment, the ampacity may decrease, requiring a larger wire size to compensate. The NEC provides guidelines for adjusting ampacity based on the temperature rating. -
Ampacity:
Ampacity is the maximum amount of electric current a wire can carry safely without overheating. Selecting wire with appropriate ampacity for the inverter’s output rating is critical. The ampacity depends on several factors, including wire size, insulation type, and ambient temperature. Ensuring that the chosen wire can handle the maximum expected current provides safety and efficiency. -
Installation Environment:
The installation environment may also dictate wire size. Factors such as exposure to moisture, chemical substances, or physical abrasion can require different wire protection measures. For example, wires exposed to wet conditions might need to be rated for wet locations, or those in high-traffic areas may need additional protective conduits. The NEC provides specifications for different environments to ensure compliance and safety.
By carefully assessing these seven factors, you can select the best inverter wire size for your specific application, ensuring safety and efficiency throughout the system.
How Does the Distance Between the Inverter and Load Influence Wire Size?
The distance between the inverter and load influences wire size significantly. Longer distances increase voltage drop. Voltage drop occurs when electrical energy loses intensity as it travels through wires. This drop leads to decreased efficiency and potential operational issues.
To compensate for voltage drop, larger wire sizes are required. Larger wires have lower resistance, which minimizes energy loss. The American Wire Gauge (AWG) system categorizes wire sizes. Smaller AWG numbers denote thicker wires.
For example, a distance of 50 feet may require a thicker 6 AWG wire to maintain efficiency. In contrast, a 20-foot distance might only require 10 AWG wire.
Calculating the appropriate wire size involves considering the load’s amperage, voltage, and distance. Electrical codes usually specify maximum allowable voltage drop. Typically, a drop below 3% is ideal for most applications.
Understanding these factors ensures efficient power delivery and prevents overheating or energy loss.
What Role Does the Amperage Rating Play in Wire Gauge Selection?
The amperage rating plays a crucial role in wire gauge selection. It ensures that the wire can safely conduct electricity without overheating or causing a fire.
- Amperage rating determines wire size.
- Insulation type affects wire gauge.
- Length of the wire run influences gauge choice.
- Application type requires specific gauge considerations.
- Regulatory standards may dictate minimum gauge.
Understanding the underlying factors related to amperage rating is essential to successful wire gauge selection.
-
Amperage Rating Determines Wire Size:
Amperage rating directly correlates with wire size. Higher amperage ratings require thicker wires to prevent overheating. For example, a 15-amp circuit typically uses a 14-gauge wire, while a 20-amp circuit usually uses a 12-gauge wire. -
Insulation Type Affects Wire Gauge:
Different insulation types can impact wire performance. Some materials can withstand higher temperatures. For instance, THHN insulation allows for smaller wire sizes at the same amperage compared to standard PVC insulation, based on the National Electrical Code (NEC) guidelines. -
Length of the Wire Run Influences Gauge Choice:
Longer wire runs need thicker wires to overcome voltage drop. Voltage drop occurs when electrical resistance in the wire reduces voltage at the end of the run. For instance, a 12-gauge wire might be sufficient for short distances, but a 10-gauge wire may be necessary for longer distances to maintain performance. -
Application Type Requires Specific Gauge Considerations:
Different applications require specific wire gauges based on load and safety standards. For example, motor loads may require a larger gauge wire to handle inrush currents. According to NEC, specific applications, such as lighting circuits or heating systems, have prescribed wire sizes. -
Regulatory Standards May Dictate Minimum Gauge:
Regulatory standards can set minimum wire sizes to ensure safety and performance. Local codes or the NEC typically provide guidelines that manufacturers and electricians must follow. These regulations address potential hazards and ensure overall electrical safety.
Which Wire Size is Best for Different Types of Inverter Systems?
The best wire size for different types of inverter systems depends on the inverter’s power rating and the distance between the inverter and the battery or load.
- Inverter Size 1,000 Watts and Below
- Inverter Size 1,001 to 2,000 Watts
- Inverter Size 2,001 to 3,000 Watts
- Inverter Size 3,001 to 4,000 Watts
- Inverter Size Above 4,000 Watts
- Considerations for Installation (Distance, Temperature, and Load)
Understanding the various inverter sizes and their corresponding wire sizes is crucial for safe and efficient operation.
-
Inverter Size 1,000 Watts and Below:
Inverter size 1,000 watts and below generally requires AWG 14 wire. This size is suitable for low power applications, such as small appliances or chargers. Using too small a wire can lead to overheating and inefficiency. The NEC (National Electrical Code) underscores the importance of using adequate wire sizes to prevent voltage drop and potential fire hazards. -
Inverter Size 1,001 to 2,000 Watts:
Inverter size between 1,001 and 2,000 watts typically requires AWG 12 wire. This wire size can handle the increased load and is essential for safety in moderate power applications. Research by Solar Energy International indicates that using the proper wire size can enhance performance and reduce energy loss. -
Inverter Size 2,001 to 3,000 Watts:
Inverter size 2,001 to 3,000 watts usually calls for AWG 10 wire. This size accommodates higher loads and ensures minimal voltage drop, essential for maintaining efficiency. The American Wire Gauge standard specifies that larger wires reduce heat buildup and improve conductivity for high power systems. -
Inverter Size 3,001 to 4,000 Watts:
Inverter size between 3,001 and 4,000 watts generally uses AWG 8 wire. This size is necessary for handling substantial current safely. Installing the wrong size may lead to performance issues or equipment damage. -
Inverter Size Above 4,000 Watts:
For inverters over 4,000 watts, AWG 6 wire is typically recommended. Large installations often require multiple runs or specialized configurations to ensure efficiency and safety. Guidelines from the National Electric Code recommend certain practices to prevent overcurrent conditions in high-capacity systems. -
Considerations for Installation (Distance, Temperature, and Load):
When selecting wire size, consider installation factors such as distance, ambient temperature, and total load. Longer distances require larger wire sizes to counteract voltage drop effectively. Higher temperatures can also affect wire performance, necessitating adjustments to standard sizing recommendations. Calculations from the U.S. Department of Energy suggest factoring in these variables for optimal performance and safety.
How Can You Maximize Safety When Choosing Inverter Wire Size?
To maximize safety when choosing inverter wire size, consider ampacity, wire length, insulation type, and application specifics.
-
Ampacity: Ampacity refers to the maximum amount of electric current a wire can safely carry without overheating. This value is influenced by factors such as gauge size and ambient temperature. For example, 12-gauge wire typically handles up to 20 amps in residential settings according to the National Electrical Code (NEC, 2017).
-
Wire length: The length of the wire affects voltage drop, which is the amount of voltage lost as electricity travels along the wire. A longer wire results in more resistance and a greater voltage drop. For inverter applications, keeping voltage drop below 3% is recommended. This ensures efficient operation and reduces the risk of overheating.
-
Insulation type: Wire insulation must be suitable for the intended environment. Common types include THHN (Thermoplastic High Heat-resistant Nylon-coated) for dry locations and UF (Underground Feeder) for wet environments. Selecting the correct insulation type ensures the wire can endure specific conditions, reducing fire risk.
-
Application specifics: The chosen wire must match the inverter’s specifications and load requirements. For instance, solar inverters typically require different wire sizes compared to residential inverters. Ensuring compatibility with the inverter’s output capacity can prevent overload and potential safety hazards.
By considering these factors, individuals can significantly reduce the risk of electrical hazards when selecting wire size for an inverter system.
What Common Missteps Should Be Avoided in Selecting Inverter Wire Size?
Common missteps to avoid when selecting inverter wire size include inadequate calculations, using incorrect wire types, neglecting temperature rating, overlooking voltage drop, and failing to consult relevant guidelines.
- Inadequate calculations
- Using incorrect wire types
- Neglecting temperature rating
- Overlooking voltage drop
- Failing to consult relevant guidelines
In selecting inverter wire size, understanding the main missteps provides a solid foundation for ensuring safety and functionality.
-
Inadequate Calculations: Inadequate calculations refer to the failure to accurately determine the current load the wire must carry. Selecting the wrong wire size can cause overheating or voltage drops. The National Electrical Code (NEC) emphasizes the importance of calculating the maximum current to prevent these issues. For example, if an inverter supports 2,000 watts at 120 volts, proper calculations indicate a necessary current of approximately 16.67 amps.
-
Using Incorrect Wire Types: Using incorrect wire types involves selecting wires that do not suit the specific application. For instance, some may choose aluminum wire instead of copper. While aluminum is lighter and less expensive, it has a higher resistance. This resistance can lead to greater energy loss and potential fire hazards. According to the NEC, copper wire is generally preferred for its better conductivity and reliability.
-
Neglecting Temperature Rating: Neglecting the temperature rating means failing to choose wires appropriate for the installation environment. Wires can degrade when exposed to high temperatures. For example, wires rated for 60°C may not withstand the heat in an attic installation. The American Wire Gauge (AWG) provides clear specifications for different environments.
-
Overlooking Voltage Drop: Overlooking voltage drop involves ignoring the decrease in voltage as electrical energy travels through the wire. Excessive voltage drop can result in underperformance of the inverter. The acceptable voltage drop is usually limited to 3% for efficiency. For instance, a 100-foot run of wire may experience significant voltage drop unless a larger gauge is selected.
-
Failing to Consult Relevant Guidelines: Failing to consult relevant guidelines signifies not using established standards like the NEC or manufacturer recommendations. These guidelines provide essential information for wire sizing based on specific applications. By adhering to these standards, users can ensure safety and compliance with local codes.