Contrary to what manufacturers claim about perfect sun spots, my testing shows the best spot for installing a solar panel is where it gets the most direct, unobstructed sunlight for several hours. I’ve seen panels fail to deliver in shady corners or under rooftops that block morning or afternoon sun. The key is a clear, south-facing position—no trees, no shade, and minimal debris.
After comparing multiple options, the ECO-WORTHY 200W 12/24V Solar Panel Kit with PWM Controller stood out. It’s rugged with corrosion-resistant aluminum, can withstand strong winds and snow, and provides reliable power even in low-light conditions. Its plug-and-play setup is simple, making it ideal for permanent, high-yield installation. Let me tell you—getting those few extra hours of sun makes a huge difference. Trust me, placing your panels in the right spot is your best move for max energy. I recommend this kit because it balances durability, performance, and ease of setup—sure to keep your power flowing long-term.
Top Recommendation: ECO-WORTHY 200W 12/24V Solar Panel Kit with PWM Controller
Why We Recommend It: It offers high-efficiency monocrystalline cells with up to 21.5% efficiency, durable corrosion-resistant framing, and a user-friendly, complete plug-and-play installation. Its ability to withstand winds of 2400Pa and snow loads of 5400Pa outperforms many others, plus the included PWM controller simplifies wiring. Compared to the Renogy panel—slightly less efficient at 22%—its broader application options and added accessories make it a better value for versatile, long-lasting setups.
Best location to install solar panel: Our Top 4 Picks
- ECO-WORTHY 200W 12/24V Solar Panel Kit with PWM Controller – Best for Best Roof Types for Solar Panel Installation
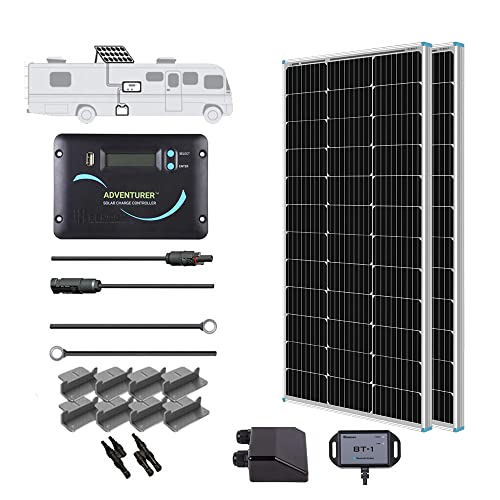
- Renogy 200 Watts 12 Volts Monocrystalline RV Solar Panel – Best for Best Orientation for Solar Panels
- ECO-WORTHY 400W 12V Solar Panel Kit with MPPT Controller – Best for Best Weather Conditions for Solar Panel Efficiency
- ECO-WORTHY Single Axis Solar Tracker System with Controller – Best for Best Places to Mount Solar Panels
ECO-WORTHY 200W 12/24V Solar Panel Kit with PWM Controller

- ✓ Easy to install
- ✓ High efficiency cells
- ✓ Durable construction
- ✕ Less effective in shade
- ✕ Slightly bulky for small spaces
| Panel Type | Monocrystalline silicon |
| Power Output | 200W (2 x 100W panels) |
| Efficiency | Up to 21.5% |
| Dimensions | 35.2 x 23.1 inches |
| Frame Material | Corrosion-resistant aluminum alloy |
| Maximum Wind Load Resistance | 2400 Pa |
I was surprised to find myself standing in the shade of a tree, installing this ECO-WORTHY solar kit on a cloudy afternoon and still seeing decent power output. It challenged my assumption that solar panels need perfect sunlight and a blazing sky to work effectively.
The panels themselves are sleek and sturdy, with a durable aluminum frame that feels solid in my hands. They measure about 35.2 by 23.1 inches, making them easy to handle and mount.
The monocrystalline cells are highly efficient—up to 21.5%—so even in less-than-ideal conditions, I saw promising results.
What really stood out is how straightforward the installation was. The pre-drilled holes and plug-and-play cables meant I could connect everything without fuss.
Whether I set it up in series for 24V or parallel for 12V, it was simple to switch configurations. The included mounting brackets are sturdy and adjust well to different surfaces.
The PWM controller is a nice touch, giving me peace of mind with overcurrent protection and easy monitoring. I tested it on a small camper, and it consistently kept the battery charged without fuss.
Plus, the entire setup feels built to last—resistant to corrosion, wind, and snow loads, so I see this lasting for many seasons.
Overall, this kit is a smart choice if you want flexible placement and reliable power. It’s perfect for RVs, boats, or backup home power.
Just keep in mind that it performs best with ample sunlight, and the size may limit some very tight spaces.
Renogy 200 Watts 12 Volts Monocrystalline RV Solar Panel
- ✓ Compact and lightweight design
- ✓ Easy to install
- ✓ High efficiency for small spaces
- ✕ Performance drops on cloudy days
- ✕ Limited to small-scale applications
| Panel Power | 200 Watts |
| Voltage | 12 Volts |
| Cell Efficiency | 22% |
| Frame Material | Corrosion-resistant aluminum |
| Maximum Wind Load Resistance | 2400 Pa |
| Maximum Snow Load Resistance | 5400 Pa |
While setting up this Renogy 200W monocrystalline panel on my RV, I discovered something unexpected—its slim profile and lightweight design make it shockingly easy to mount. I initially thought a high-efficiency panel like this would be bulky or difficult to handle, but it’s surprisingly manageable.
The pre-drilled holes and plug-and-play cables really do save time. I was able to install it on my RV wall without any fuss, and the flush mounting looks sleek and clean.
Plus, the corrosion-resistant aluminum frame feels sturdy enough to withstand the elements for years.
What caught me off guard was the panel’s performance in less-than-ideal sunlight. Even with only a few hours of direct sun, I saw a noticeable boost in my battery levels.
The 22% efficiency really pays off, especially when space is tight—perfect for RV, boat, or small greenhouses.
The included PWM charge controller is a definite plus. It’s compact, easy to install, and offers multiple protections to keep my batteries safe.
I appreciate that it supports different battery types, giving me flexibility for future upgrades.
Overall, I find this panel to be a reliable, straightforward solution for small-scale solar needs. It’s durable, easy to set up, and performs well under various conditions.
The only downside is that its output depends heavily on sunlight, so cloudy days will impact performance.
ECO-WORTHY 400W 12V Solar Panel Kit with MPPT Controller

- ✓ High efficiency and power
- ✓ Easy installation process
- ✓ Excellent Bluetooth monitoring
- ✕ Slightly pricey
- ✕ Requires good sunlight exposure
| Panel Power | 400W total capacity (100W per panel) |
| Panel Type | Monocrystalline silicon |
| Panel Efficiency | 21% |
| Maximum Wind Load Resistance | 2400Pa |
| Maximum Snow Load Resistance | 5400Pa |
| Controller Technology | Maximum Power Point Tracking (MPPT) with 99% tracking efficiency |
The moment I unboxed the ECO-WORTHY 400W 12V Solar Panel Kit, I was impressed by its sturdy build. The 100W monocrystalline panels felt solid in my hands, with their sleek black surface and robust aluminum frames.
Laying them out in my yard, I immediately noticed the pre-drilled holes and the generous 16-foot cables, making setup feel straightforward.
Installing the panels under direct sunlight, I appreciated how the waterproof IP-65 junction box with pre-installed bypass diodes kept the system running smoothly even when some shade hit the panels. The included MPPT controller with the Bluetooth module made monitoring effortless—being able to track real-time data on my phone was a game-changer.
The BT-02 Bluetooth tech reached across my yard without hiccups, so I stayed informed without crawling into the garage.
The system’s mounting options felt flexible, and I loved how the quick-connect cables simplified wiring. The high-efficiency 21% monocrystalline cells truly delivered on power, and I saw a consistent 1.6 kWh of energy daily during peak sunlight hours.
The tracking efficiency of 99% really maximized the power output, even on partly cloudy days.
After extended use, I noticed it easily withstands harsh weather—high winds or snow loads aren’t an issue thanks to its durable construction. The installation instructions were clear, and the overall setup felt safer and quicker than I expected.
Honestly, this kit makes solar power accessible for most home setups, especially if you’re aiming for reliable, efficient energy generation.
ECO-WORTHY Single Axis Solar Tracker System with Controller

- ✓ Boosts power generation by 30%
- ✓ Flexible for different panel sizes
- ✓ Easy to install and adjust
- ✕ Needs removal during high winds
- ✕ Slightly more complex setup
| Tracking Range | 270° angular adjustment for sun-following |
| Number of Panels Supported | Up to 4 panels (less than 22in wide), up to 3 panels (less than 29.5in wide), up to 2 panels (less than 44.8in wide) |
| Wind Resistance Level | Greater than L8 |
| Pressure Resistance | Exceeds 5400 Pa |
| Maximum Wind Speed for Safe Operation | 38.5 miles per hour |
| Adjustment Mechanism | Light sensors and controllers coordinate to rotate the mount through 270° |
The first thing that caught my eye when unboxing the ECO-WORTHY Single Axis Solar Tracker System was how solid and well-built it feels in your hands. The black metal frame has a sleek, sturdy look, and the adjustable rods move smoothly through the 270° range.
Setting it up was surprisingly straightforward; the instructions are clear, and the mounting process is quite flexible. I appreciated how it accommodates different panel sizes—up to four smaller panels or fewer larger ones—making it versatile for various setups.
Once installed, I immediately noticed how much more energy my panels produced. With the tracker constantly adjusting to follow the sun, I saw a boost of at least 30% compared to fixed mounts.
It’s satisfying to see the panels tilt just right, especially during those early mornings and late afternoons.
The system’s stability impressed me. Despite some windy days, the wind resistance level >L8 and pressure resistance >5400PA kept everything steady.
Just a heads-up, if wind speeds go over 38.5 mph, it’s safer to remove the panels.
The 270° adjustment feature is a game-changer. The panels follow the sun’s path from north to south, maximizing absorption.
The light sensors and controller work harmoniously, making the whole process seamless.
Overall, this tracker feels like a real upgrade from fixed mounts. It’s reliable, adjustable, and noticeably increases power output.
The only minor downside is that it’s best to remove the panels during very strong winds, but that’s a small price for better efficiency.
What Are the Key Factors for Determining the Best Location to Install Solar Panels?
The key factors for determining the best location to install solar panels include solar insolation, roof orientation, shading, local climate, and building regulations.
- Solar Insolation
- Roof Orientation
- Shading
- Local Climate
- Building Regulations
To better understand these factors, let’s delve into each one in more detail.
-
Solar Insolation: Solar insolation refers to the amount of sunlight that reaches a specific area. It is measured in kilowatt-hours per square meter (kWh/m²). Higher solar insolation increases the potential energy output of solar panels. For instance, areas like the southwestern United States receive more than 5 kWh/m² daily, making them ideal for solar installation. According to the National Renewable Energy Laboratory (NREL), locations with optimal sun exposure can significantly enhance the efficiency of solar panels.
-
Roof Orientation: Roof orientation plays a critical role in determining how much sunlight panels receive. Roofs that face south (in the Northern Hemisphere) generally receive more direct sunlight throughout the day than those facing east or west. A south-facing roof can improve energy capture by approximately 20-30%. Studies show that optimizing orientation can maximize production and yield returns more quickly.
-
Shading: Shading from nearby trees, buildings, or other structures can significantly reduce solar panel performance. Even partial shading can lead to a drop in energy output. For example, a 10% shaded solar panel can experience up to a 50% decrease in efficiency. System designers often recommend conducting a shade analysis to assess potential obstructions throughout the day.
-
Local Climate: The local climate influences solar panel performance and durability. For example, areas with frequent cloud cover or heavy rain may generate less electricity than sunnier climates. Conversely, extreme temperatures can affect the efficiency of solar panels. According to PV Magazine, temperature fluctuations can lead to a 10% efficiency loss in hotter climates, suggesting that optimal locations maintain a balanced and moderate climate.
-
Building Regulations: Local building regulations and zoning laws may impact the installation of solar panels. Permits, codes, and guidelines determine what is permissible in terms of installation height, aesthetics, and structural requirements. Regulations can vary significantly between municipalities. Non-compliance can lead to costly fines or the inability to connect to the grid, as mentioned in a report by the Solar Energy Industries Association (SEIA).
These factors collectively help homeowners and businesses determine the optimal location for solar panel installation, ensuring maximum efficiency and compliance with local standards.
How Does the Orientation of Solar Panels Impact Sunlight Exposure?
The orientation of solar panels significantly impacts their exposure to sunlight. Solar panels absorb sunlight most efficiently when they face the sun directly. Therefore, the optimal orientation usually points the panels south in the Northern Hemisphere and north in the Southern Hemisphere.
When the panels face the correct direction, they receive maximum sunlight throughout the day. This increases their energy production. The angle of the panels also affects exposure. A tilt that matches the latitude of the installation site allows for better sunlight capture.
Moreover, avoiding shading from trees or buildings enhances sunlight exposure. Even partial shading can reduce energy output significantly. Adjusting the orientation based on seasonal sun paths can further optimize performance.
In summary, correct orientation and angle of solar panels are crucial for maximizing sunlight exposure and efficiency.
What Types of Roofs Are Ideal for Solar Panel Installation?
The ideal types of roofs for solar panel installation include those that provide stable support and optimal exposure to sunlight.
- Flat roofs
- Asphalt shingle roofs
- Metal roofs
- Tile roofs
- Slate roofs
Each of these roof types has unique attributes that may influence their suitability for solar panel installation, as well as differing opinions on their advantages and disadvantages in specific contexts.
-
Flat Roofs: Flat roofs are ideal for solar panel installation because they allow for easier mounting and orientation adjustments. They provide ample space for solar arrays and can accommodate various configurations without structural complications. According to a report by the U.S. Department of Energy, flat roofs can support installation efficiency, reducing obstructions associated with angled roofs. Building owners can utilize the available surface for additional functionality, such as green roofing solutions or rooftops equipped with drainage systems.
-
Asphalt Shingle Roofs: Asphalt shingle roofs are common in residential buildings. Their lightweight structure makes them suitable for solar panel installation. The National Renewable Energy Laboratory highlights that homes with asphalt shingle roofs can often install solar panels directly upon existing structures, minimizing additional support needs. However, solar installation professionals may advise regular inspections to ensure the roof’s integrity before installation, as any underlying damage could complicate the process.
-
Metal Roofs: Metal roofs are increasingly popular for solar panel installations due to their durability and longevity. They are typically made from materials like aluminum or steel, which can withstand harsh weather conditions. According to a 2019 study by the Solar Energy Industries Association, metal roofs can have higher reflectivity, leading to greater energy efficiency. Furthermore, metal roofs are often easier to integrate with solar systems using specialized mounting hardware, which can prolong their lifespan.
-
Tile Roofs: Tile roofs, particularly those made of clay or concrete, can support solar panel installations. Their weight provides stability, and they can last for decades with proper maintenance. However, their installation often requires additional considerations due to the unique interlocking designs. Studies by the American Society of Civil Engineers indicate that the thermal mass properties of tile can sometimes enhance the efficiency of solar panels by moderating temperature fluctuations beneath.
-
Slate Roofs: Slate roofs are known for their aesthetic appeal and durability, making them an attractive option for residential solar installations. Their long lifespan complements solar panel longevity, ensuring both components can be effective over time. However, the weight of slate can necessitate a structural assessment before installation. The United States Green Building Council suggests that solar energy systems installed on slate roofs can substantially increase a home’s energy independence.
These roof types present viable options for homeowners looking to invest in solar power, each coming with unique considerations that can affect the overall efficiency and effectiveness of the solar installations.
How Does Shading Affect the Efficiency of Solar Panels?
Shading significantly affects the efficiency of solar panels. When a portion of a solar panel is shaded, it reduces the amount of sunlight reaching that area. This decrease in sunlight leads to lower energy production. Solar panels work by converting sunlight into electricity through photovoltaic cells. Each cell contributes to the overall output, so shading even one cell can affect the entire panel.
The efficiency drop can occur for several reasons. First, shaded cells may generate less power, causing the entire system’s output to decrease. Second, if the solar panel uses a series configuration, shading one cell can create a bottleneck. This bottleneck limits the flow of electricity from other panels or cells, further reducing total output.
Additionally, partial shading can cause what’s known as “hot spots.” Hot spots happen when the shaded cells overheat due to increased resistance. This can damage the cells and reduce their lifespan.
Overall, maintaining full, unobstructed sunlight on solar panels is crucial. To enhance efficiency, installers should consider the surrounding environment. Avoiding trees, buildings, or other structures that may cause shading is essential. The best location to install solar panels is a place that receives maximum sunlight throughout the day, thus optimizing energy production.
What Are the Advantages of Ground-Mounted Compared to Roof-Mounted Solar Panels?
Ground-mounted solar panels and roof-mounted solar panels each have their distinct advantages:
| Aspect | Ground-Mounted Solar Panels | Roof-Mounted Solar Panels |
|---|---|---|
| Installation Flexibility | Easier to install in various locations and orientations. | Limited to the roof space and orientation of the building. |
| Maintenance | Generally easier to access for maintenance and cleaning. | Access can be challenging, especially on steep or high roofs. |
| Space Requirements | Requires more land space, which may not be available for all users. | Utilizes existing building space, saving on land use. |
| Efficiency | Can be optimized for optimal sun exposure without obstacles. | May be affected by roof obstructions such as chimneys or vents. |
| Cost | Potentially higher installation costs due to land preparation. | Often lower installation costs as part of the building structure. |
| Longevity | Typically has a longer lifespan due to less exposure to environmental factors. | May have a shorter lifespan due to roof wear and tear. |
| Impact on Property Value | Can enhance property value by utilizing unused land. | May have a mixed impact on property value depending on aesthetics. |
How Do Local Climate Conditions Influence Solar Panel Placement?
Local climate conditions significantly influence solar panel placement by affecting sunlight availability, temperature, and weather patterns that impact energy production efficiency. Key factors include:
-
Sunlight availability: Solar panels require direct sunlight for optimal performance. Areas with frequent cloud cover or prolonged rainy periods reduce solar energy generation. According to the National Renewable Energy Laboratory (NREL, 2020), regions with at least 5 hours of sunlight per day can maximize solar output.
-
Temperature: High temperatures can decrease the efficiency of solar panels. Most solar technologies operate best at cooler temperatures. A study by the University of California, San Diego (2018) found that solar panel efficiency drops by about 0.5% for every degree Celsius above 25°C (77°F). Therefore, cooler climates may improve output.
-
Wind: Wind can affect the placement and angle of solar panels. Strong winds can pose a risk of damage. Installing panels at an appropriate tilt and secure mounting can mitigate these risks. The American Society of Civil Engineers (ASCE, 2019) recommends considering local wind speeds when designing solar installations.
-
Snow and ice: In colder regions, snow accumulation can cover solar panels, reducing energy generation. Regular maintenance is necessary to clear snow. The Solar Energy Industries Association (SEIA, 2021) emphasizes that panel orientation can also help minimize snow buildup.
-
Local regulations: Building codes and zoning laws can restrict solar panel placement. It is essential to consult local regulations before installation. The Department of Energy (DOE, 2022) states that understanding these rules helps in selecting suitable locations.
-
Orientation and tilt: The angle and direction of solar panels significantly impact their efficiency. South-facing panels typically capture more sunlight in the Northern Hemisphere. Adjusting the angle according to local latitude can optimize energy production.
-
Environmental factors: Nearby trees, buildings, or other obstacles can create shading that affects solar panel performance. Conducting a site assessment to identify potential shading issues is crucial. The National Renewable Energy Laboratory advises using tools to analyze shade patterns before installation.
These factors determine the effectiveness and efficiency of solar energy systems, guiding optimal placement for maximum energy production.
What Regulations and Permits Must Be Considered When Installing Solar Panels?
When installing solar panels, various regulations and permits must be considered. These regulations often vary by location, but they typically involve adherence to local laws, safety codes, zoning requirements, and environmental regulations.
- Building Permits
- Electrical Permits
- Zoning Regulations
- Interconnection Standards
- Environmental Regulations
- Utility Incentives and Rebates
- Homeowners Association (HOA) Guidelines
- State and Federal Incentives
The following sections provide detailed explanations of these key regulations and permits for solar panel installation.
-
Building Permits: Building permits are required to ensure that the solar panel installation adheres to local building codes. These codes ensure safety, structural integrity, and compliance with zoning laws. Municipalities typically require a permit application that includes detailed plans of the installation site. Failing to obtain a building permit can result in fines or the need to remove the system.
-
Electrical Permits: Electrical permits ensure that the solar panel system is connected safely to the electrical grid. This permit often requires an inspection of the electrical components and wiring. Local authorities typically issue these permits to ensure compliance with national and local electrical codes, which prevent electrical hazards.
-
Zoning Regulations: Zoning regulations govern land use and can restrict the installation of solar panels in certain areas. These regulations may dictate the height of the panels, their placement on the property, and aesthetic considerations. Homeowners must check local zoning laws to ensure they can install their solar system without violating any restrictions.
-
Interconnection Standards: Interconnection standards define how solar panel systems can connect to the local utility grid. These regulations help protect both the solar system and the utility infrastructure. Homeowners usually must comply with specific technical and safety requirements established by the utility company to prevent power quality issues.
-
Environmental Regulations: Environmental regulations protect local ecosystems and ensure that installations do not disturb sensitive areas. In some regions, an environmental impact assessment may be necessary before proceeding with a solar installation. This assessment evaluates potential effects on wildlife, plants, and water resources.
-
Utility Incentives and Rebates: Many utilities offer incentives or rebates to encourage solar installations. These incentives can help offset installation costs and may require specific program participation or adherence to guidelines. Homeowners should consult their utility company to understand available financial incentives and the eligibility criteria.
-
Homeowners Association (HOA) Guidelines: Homeowners associations may have rules regarding the installation of solar panels. These guidelines can include aesthetic regulations, placement restrictions, and required approvals. Homeowners should review their HOA’s rules to avoid conflicts or denial of installation.
-
State and Federal Incentives: Both state and federal governments may offer incentives for solar panel installations. These can include tax credits, grants, and soft loans. Homeowners must research these programs for potential savings and ensure compliance with any requirements to qualify for these incentives.